 |
|
|
#12 |
|
HOMO-Sapien
Join Date: Jun 2006
Location: Chelmsford
Posts: 6,692
|
Blimmy that's superb - but how did you do that?
__________________
 I just got lost in thought.. It was very unfamiliar territory. Techie Talk | My gaming Blog | PC spec | The Admirals log |
|
|

|
|
|
#14 |
|
Vodka Martini
Join Date: Jun 2006
Posts: 791
|
Without wanting to step on anyone's toes, I thought I would bang together a very very quick tutorial for you mate
 This is in Photoshop CS2 on the Mac, but for 7 on the PC it's the same. 1. Select the eye with the circular marquee tool. (Click and hold on the marquee tool to show all the shape options for it). Hold shift while you drag to keep the marquee perfectly round.  2. Go to select > feather and feather the selection by 1 pixel. (1 pixel was right for this size of image, for much larger images you will have to experiment) You'll be able to see the difference in the selection once you've done this, it'll look a bit ragged. (see 2nd pic of these two)    3. Go image>adjustments>desaturate. This will turn the selected area black and white. It will be greyish though as opposed to black, but we'll fix that.   4. Go to image > adjustments > levels. See the black 'hump' in the graph? Drag the left hand (black) arrow to the left of that hump (see pic). You'll see the selected area get much darker.   5. You're done! Now you can just do the other eye. All these steps are 'adjustable' if they don't happen to work quite right for a particular image, they're a decent point to start experimenting from.  Hope that helps!
__________________

Last edited by Mohinder; 25-05-2007 at 20:09. |
|
|

|
|
|
#15 |
|
Dirteh Kitteh
Join Date: Jan 2007
Location: Hiding out in Mormon Country
Posts: 1,629
|
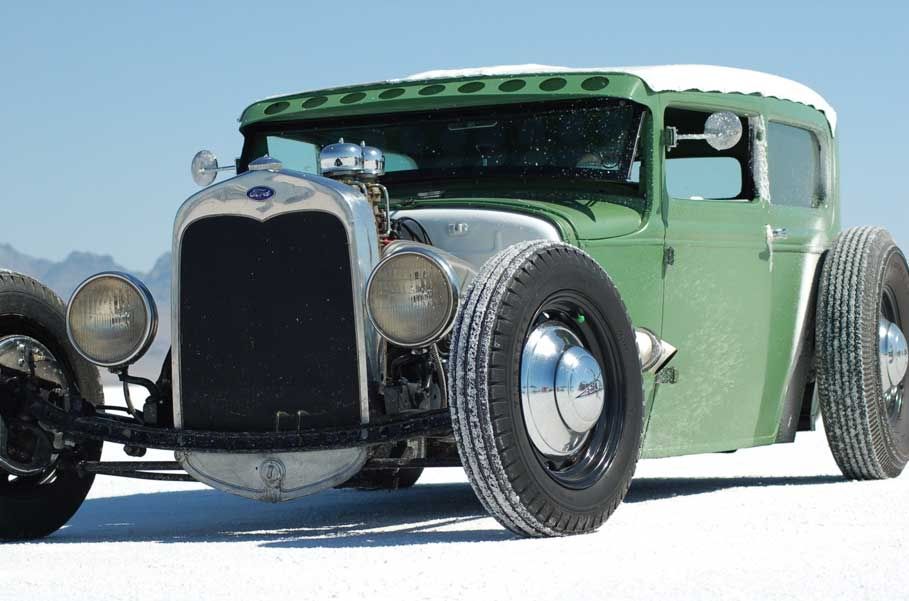
Ok, now I'm interested in what vehicle that is in the background of the last pic....

__________________
A bullet may have your name on it, but shrapnel is addressed "to whom it may concern". |
|
|

|
|
|
#16 |
|
Vodka Martini
Join Date: Jun 2006
Posts: 791
|
Here it is for you Darrin
 
__________________

|
|
|

|
|
|
#17 |
|
Dirteh Kitteh
Join Date: Jan 2007
Location: Hiding out in Mormon Country
Posts: 1,629
|
*SPLOOGE!!*
Sorry, I'll clean that up in a bit....
__________________
A bullet may have your name on it, but shrapnel is addressed "to whom it may concern". |
|
|

|